第2节:世界杯竞猜(hardhat框架)
小白入门:https://github.com/dukedaily/solidity-expert ,欢迎star转发,文末加V入群。
职场进阶: https://dukeweb3.com
概述
通过学习,掌握最主流的开发框架hardhat,从而了解如何管理以太坊工程代码,并掌握如何进行常用操作,单元测试等。
前置条件
了解JavaScript(TypeScript)
了解合约开发基础
学习目标
- 了解技术栈、hardhat框架使用:编译、部署、verify、单元测试、查看size、部署消耗gas统计
- 早期2018年工具链:solidity(0.4.16) + truffle + infura (rpc)+ web3.js(重,强大) + js
- 目前2022年工具链:solidity(0.8.16) + hardhat + alchemy (更快)+ ethers.js(轻) + ts
- 集成WorldCup合约,完成部署、verify、单元测试
创建hardhat项目
#创建npm空项目
npm init

#安装命令,对照两个版本的差异性
npm install --save-dev hardhat@2.11.1 # 新案例,新工具包
npm install --save-dev hardhat@2.9.7

#创建工程
npx hardhat-》选择高级ts项目
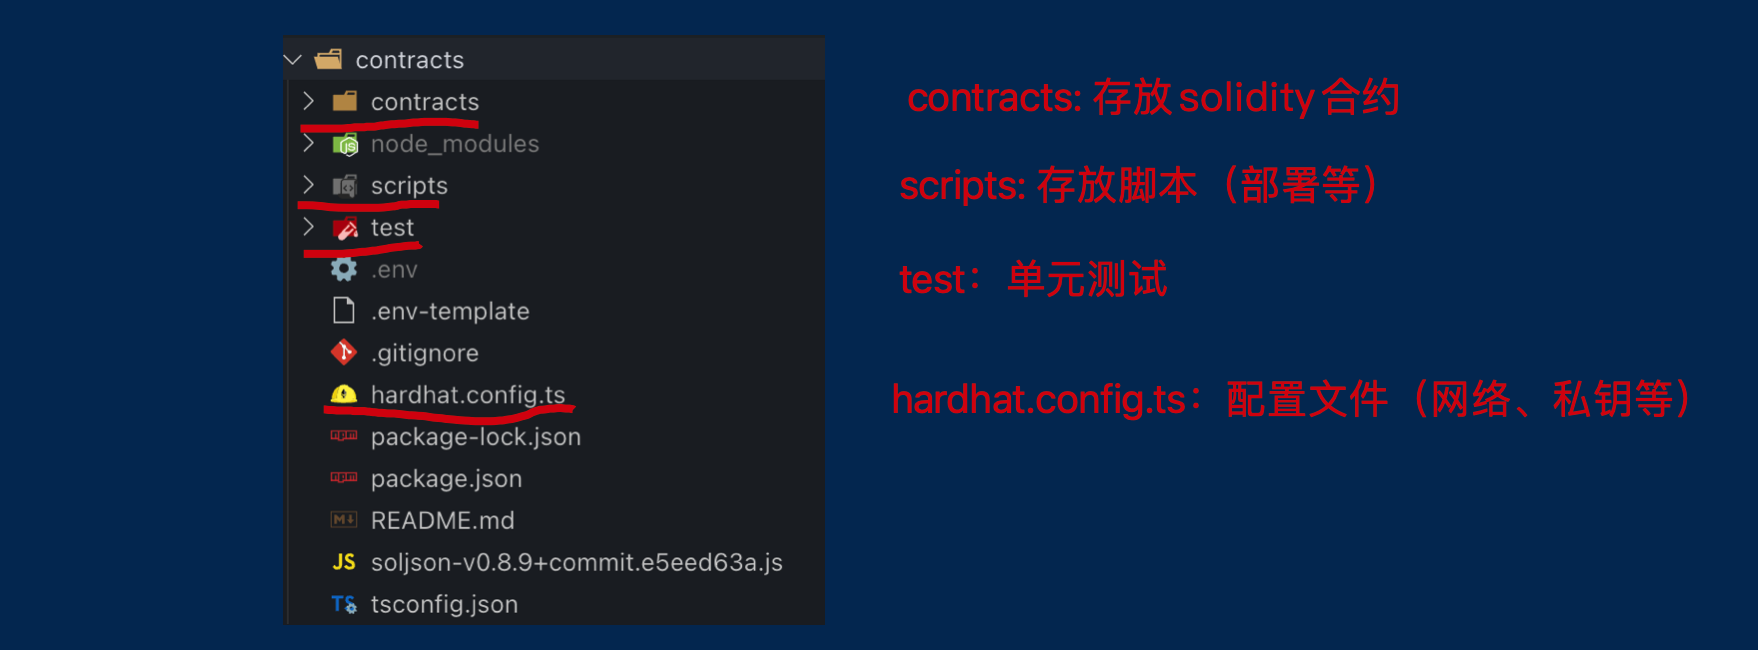
目录结构
运行测试
#编译合约
npx hardhat compile

#单元测试
npx hardhat test
执行效果如下:
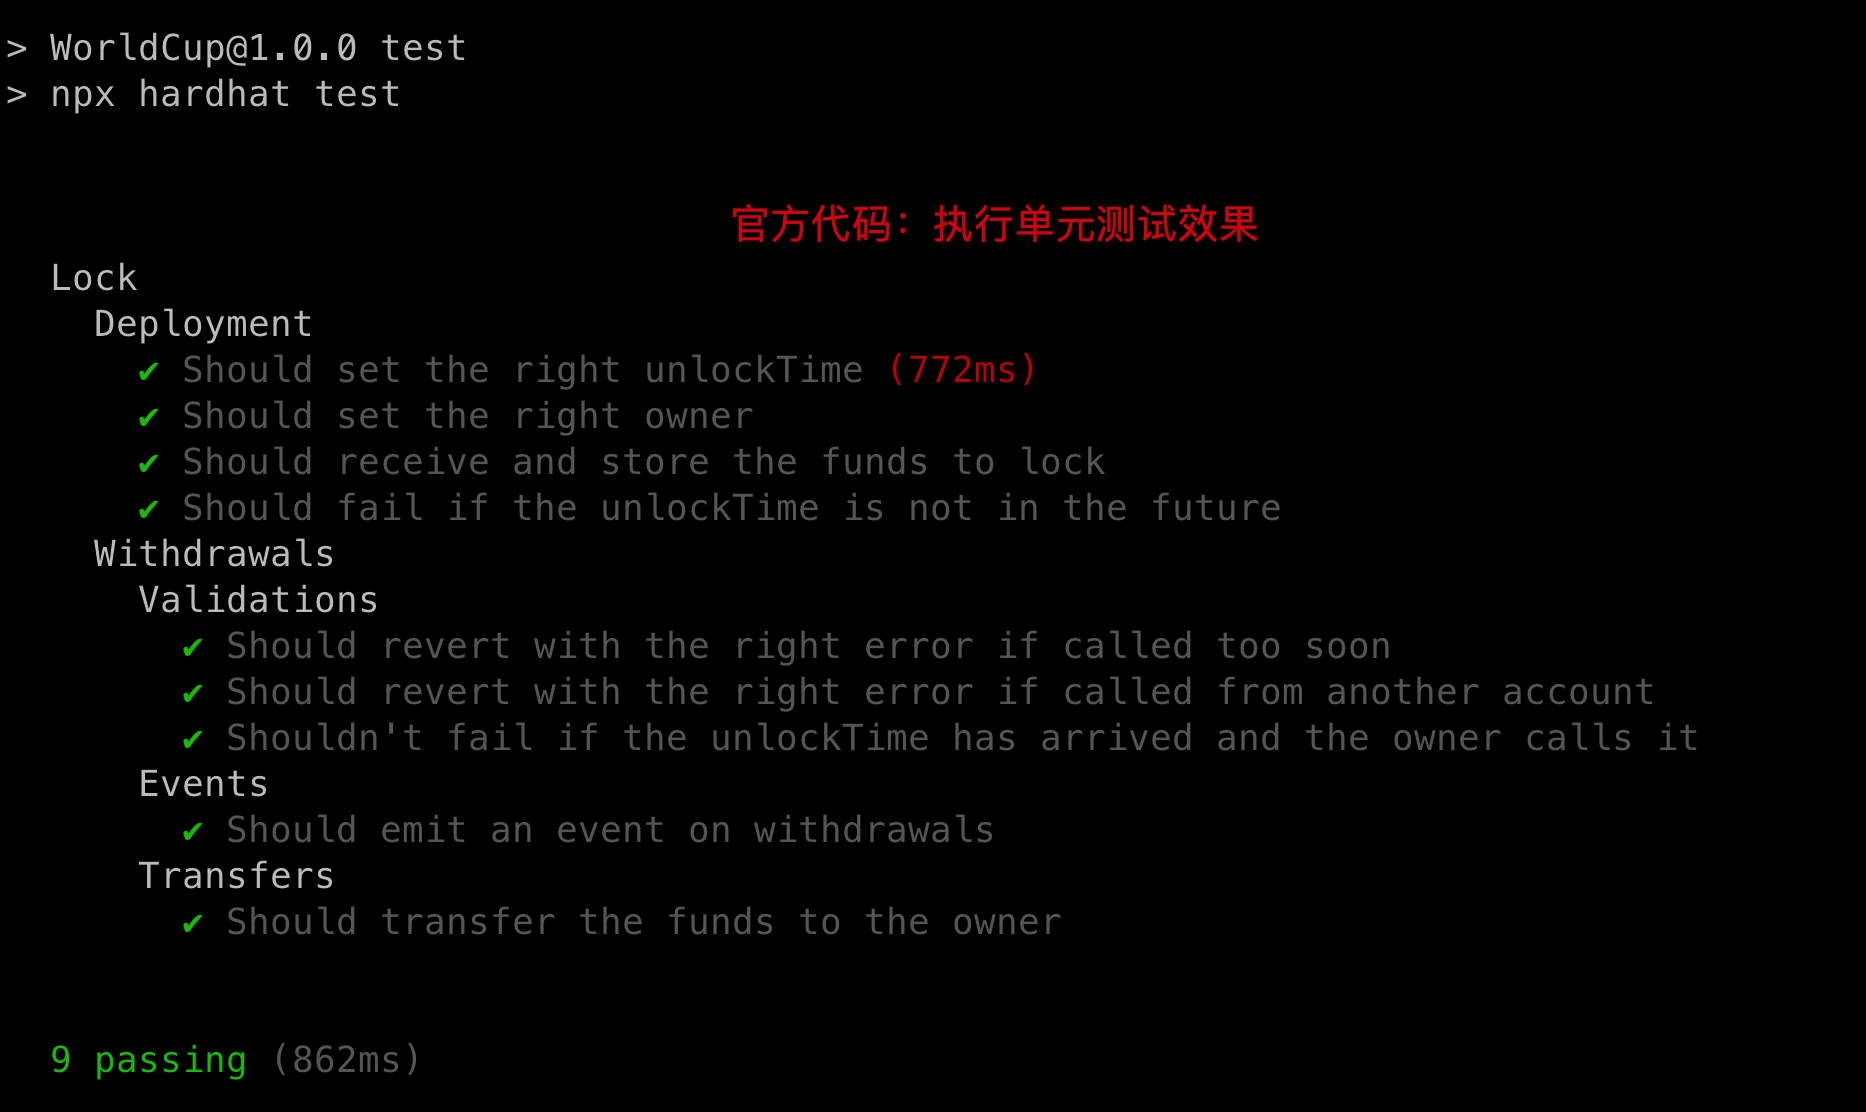
至此,官方代码我们已经验证完成(逻辑很简单,请自行阅读,如有疑问请咨询:dukeweb3),接下来我们需要改造成自己的代码!
添加合约
将Worldcup.sol(上节编写的合约)添加到contracts目录,编译:npm run compile
编写单元测试
- 创建test/WorldCup.ts,用于编写测试文件,首先引入测试工具包:
import { time, loadFixture } from "@nomicfoundation/hardhat-network-helpers";
import { anyValue } from "@nomicfoundation/hardhat-chai-matchers/withArgs";
import { expect } from "chai";
import { ethers } from "hardhat";
import hre from "hardhat";
import { WorldCup } from "../typechain-types";
- 合约初始化部署
describe("WorldCup", function () {
      async function deployWorldcupFixture() {

                // 获取第一个钱包对象,用于发起交易
        const [owner, otherAccount] = await ethers.getSigners();

          // 获取合约对象
        const WorldCup = await ethers.getContractFactory("WorldCup");
        const deadline = (await time.latest()) + TWO_WEEKS_IN_SECS;

          // 部署合约
        const worldcup = await WorldCup.deploy(deadline);
        return { worldcup, deadline, owner, otherAccount };
    }

    this.beforeEach(async () => {
          // 从内存中获取合约状态快照(仅用于测试),执行每个单元测试的时候,状态都会回到最初
        const { worldcup, owner, otherAccount, deadline } = await loadFixture(deployWorldcupFixture);
        worldcupIns = worldcup
        ownerAddr = owner.address
        otherAccountAddr = otherAccount.address
        deadline1 = deadline
    })
  })
- 编写测试逻辑
    describe("Deployment", function () {
          // 检查部署后,owner是否正确
        it("Should set the right owner", async function () {
            const { worldcup, owner } = await loadFixture(deployWorldcupFixture);
            expect(await worldcupIns.admin()).to.equal(ownerAddr);
        });

          // 检查部署时,如果传入参数不满足,是否会抛出异常
        it("Should fail if the deadline is not in the future", async function () {
            const latestTime = await time.latest();
            const WorldCup = await ethers.getContractFactory("WorldCup");
            await expect(WorldCup.deploy(latestTime)).to.be.revertedWith(
                "WorldCupLottery: invalid deadline!"
            );
        });
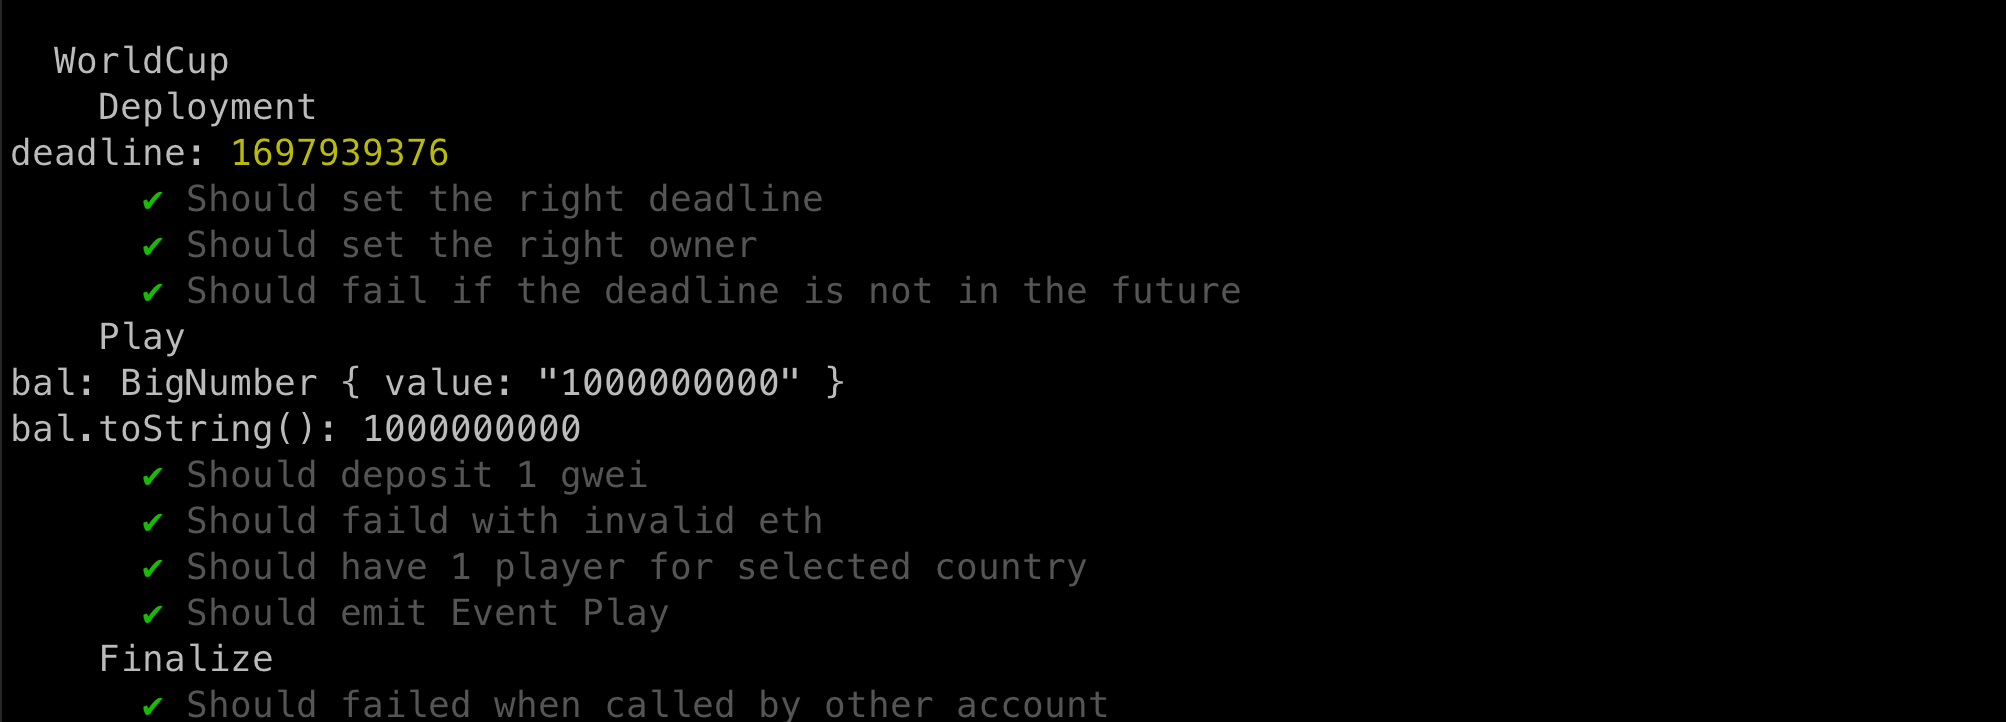
编写完,运行单元测试:npm run test,效果如下:(请运行GitHub上面的代码,此处是精简版,无法运行,仅用于说明原理)
单元测试至此告一段落,接下来我们开始考虑将代码部署到区块链网络中。
部署到本地网络
hardhat内部实现了一个本地evm,可以运行一个本地节点,开发过程,我们可以选择启动节点,并在上面部署,具体如下:
#运行脚本,部署合约
npx hardhat run scripts/deploy.ts

#启动节点node
npx hardhat node

#部署合约到本地node节点
npx hardhat run scripts/deploy.ts --network localhost
效果如下,方便快速验证合约及脚本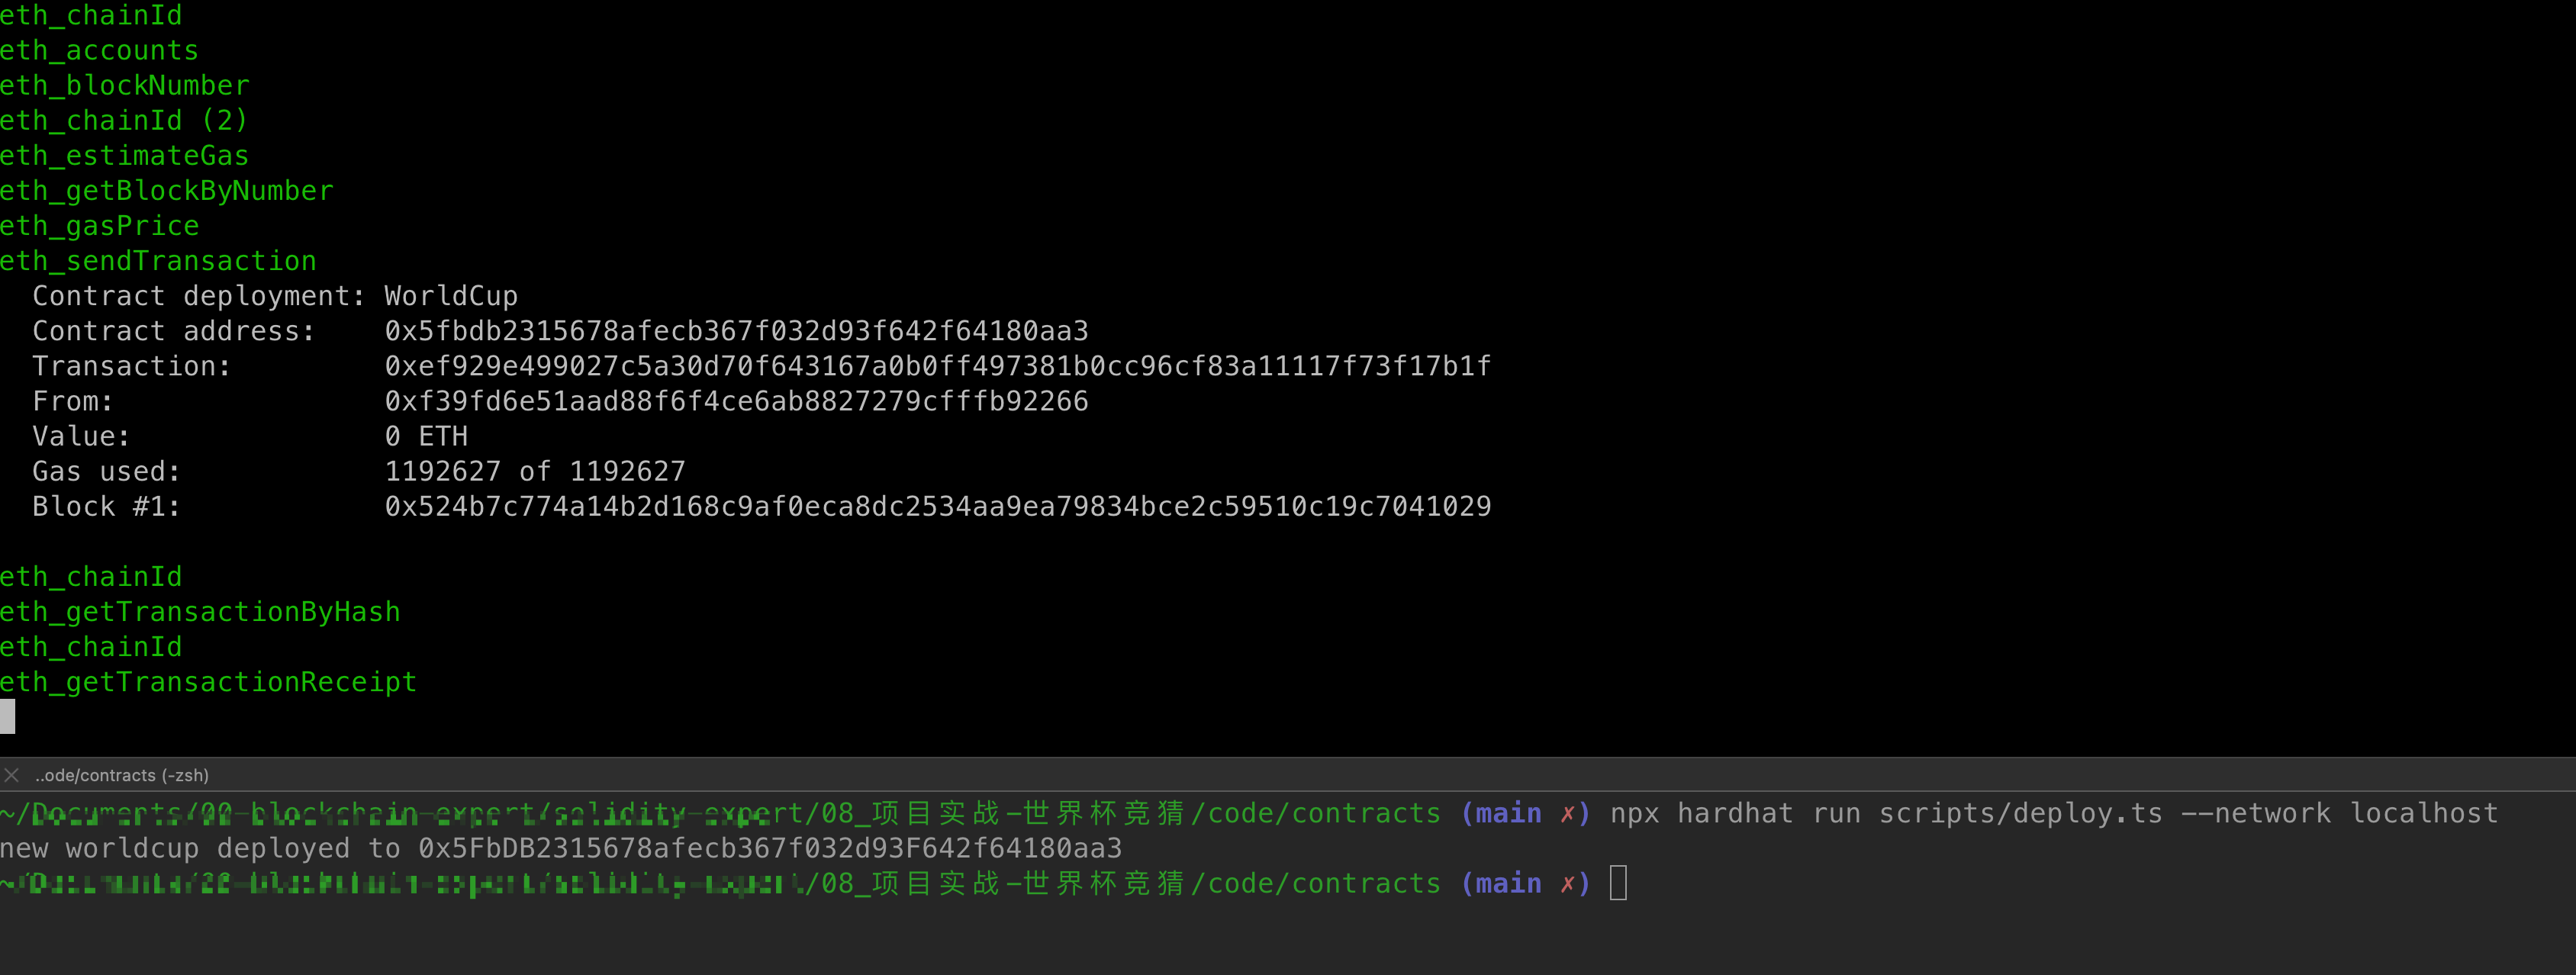
修改配置文件
如果想部署到真实的测试网络,我们需要修改一下配置文件:hardhat.config.ts,具体如下:
import { HardhatUserConfig } from "hardhat/config";
import "@nomicfoundation/hardhat-toolbox";

// 在配置文件中引用,
// 需要单独安装:npm install dotenv
require('dotenv').config()

let ALCHEMY_KEY = process.env.ALCHEMY_KEY || ''
let INFURA_KEY = process.env.INFURA_KEY || ''
let PRIVATE_KEY = process.env.PRIVATE_KEY || ''
let ETHERSCAN_API_KEY = process.env.ETHERSCAN_API_KEY || ''

console.log(ALCHEMY_KEY);
console.log(INFURA_KEY);
console.log(PRIVATE_KEY);
console.log(ETHERSCAN_API_KEY);

const config: HardhatUserConfig = {
    // solidity: "0.8.9",
    // 配置网络 kovan, bsc, mainnet
    networks: {
        hardhat: {
        },
          // 配置goerli网络
        goerli: {
            url: `https://eth-goerli.alchemyapi.io/v2/${ALCHEMY_KEY}`,
            accounts: [PRIVATE_KEY]
        },
        kovan: {
            url: `https://kovan.infura.io/v3/${INFURA_KEY}`,
            accounts: [PRIVATE_KEY]
        }
    },
    // 配置自动化verify相关
    etherscan: {
        apiKey: {
            goerli: ETHERSCAN_API_KEY
        }
    },
    // 配置编译器版本
    solidity: {
        version: "0.8.9",
        settings: {
            optimizer: {
                enabled: true,
                runs: 200
            }
        }
    },
};

export default config;
修改部署脚本
修改scripts/deploy.ts
import { ethers } from "hardhat";

async function main() {
  const TWO_WEEKS_IN_SECS = 14 * 24 * 60 * 60;
  const timestamp = Math.floor(Date.now() / 1000)
  const deadline = timestamp + TWO_WEEKS_IN_SECS;
  console.log(timestamp)

  // 获取对象
  const WorldCup = await ethers.getContractFactory("WorldCup");
  // 部署
  const worldcup = await WorldCup.deploy(deadline);
    // 等待部署完成
  await worldcup.deployed();

  console.log(`new worldcup deployed to ${worldcup.address}`);
}

main().catch((error) => {
  console.error(error);
  process.exitCode = 1;
});
部署到goerli网络:
# npx hardhat run scripts/deploy.ts --network <netWorkName>
npx hardhat run scripts/deploy.ts --network goerli  #在配置文件中已经配置了

# 得到地址如下:0xD0f85823D7e118BB7fa4D460A25851fCf99f7Fa9

自动验证代码:
# npx hardhat verify <contractAddr> [para1] [para2] ...  --network goerli
npx hardhat verify 0xD0f85823D7e118BB7fa4D460A25851fCf99f7Fa9 1665193342  --network goerli
效果如下:

小结
至此,我们本节内容全部完成了,主要学习了hardhat的安装,基础命令,单元测试编写,并且结合我们的业务合约,通过修改配置文件和脚本,成功的部署到了goerli测试网络,且自动verify代码,这些都是我们日常开发过程中的真实开发步骤,请务必好好消化!
本文代码托管在github:https://github.com/dukedaily/solidity-expert, 欢迎start,谢谢支持!
下次预告
- 主流token协议
- ERC20 -> USDT,DAI,approve, allowance, transfer, transferFrom, safeTransfer...
- ERC721 -> NFT1
- ERC1155 -> NFT2
加V入群:dukeweb3,公众号:阿杜在新加坡,一起抱团拥抱web3,下期见!
关于作者:国内第一批区块链布道者;2017年开始专注于区块链教育(btc, eth, fabric),目前base新加坡,专注海外defi,dex,元宇宙等业务方向。